Laravel Telescope
번역일: 2026년 6월 20일
Laravel Telescope
소개
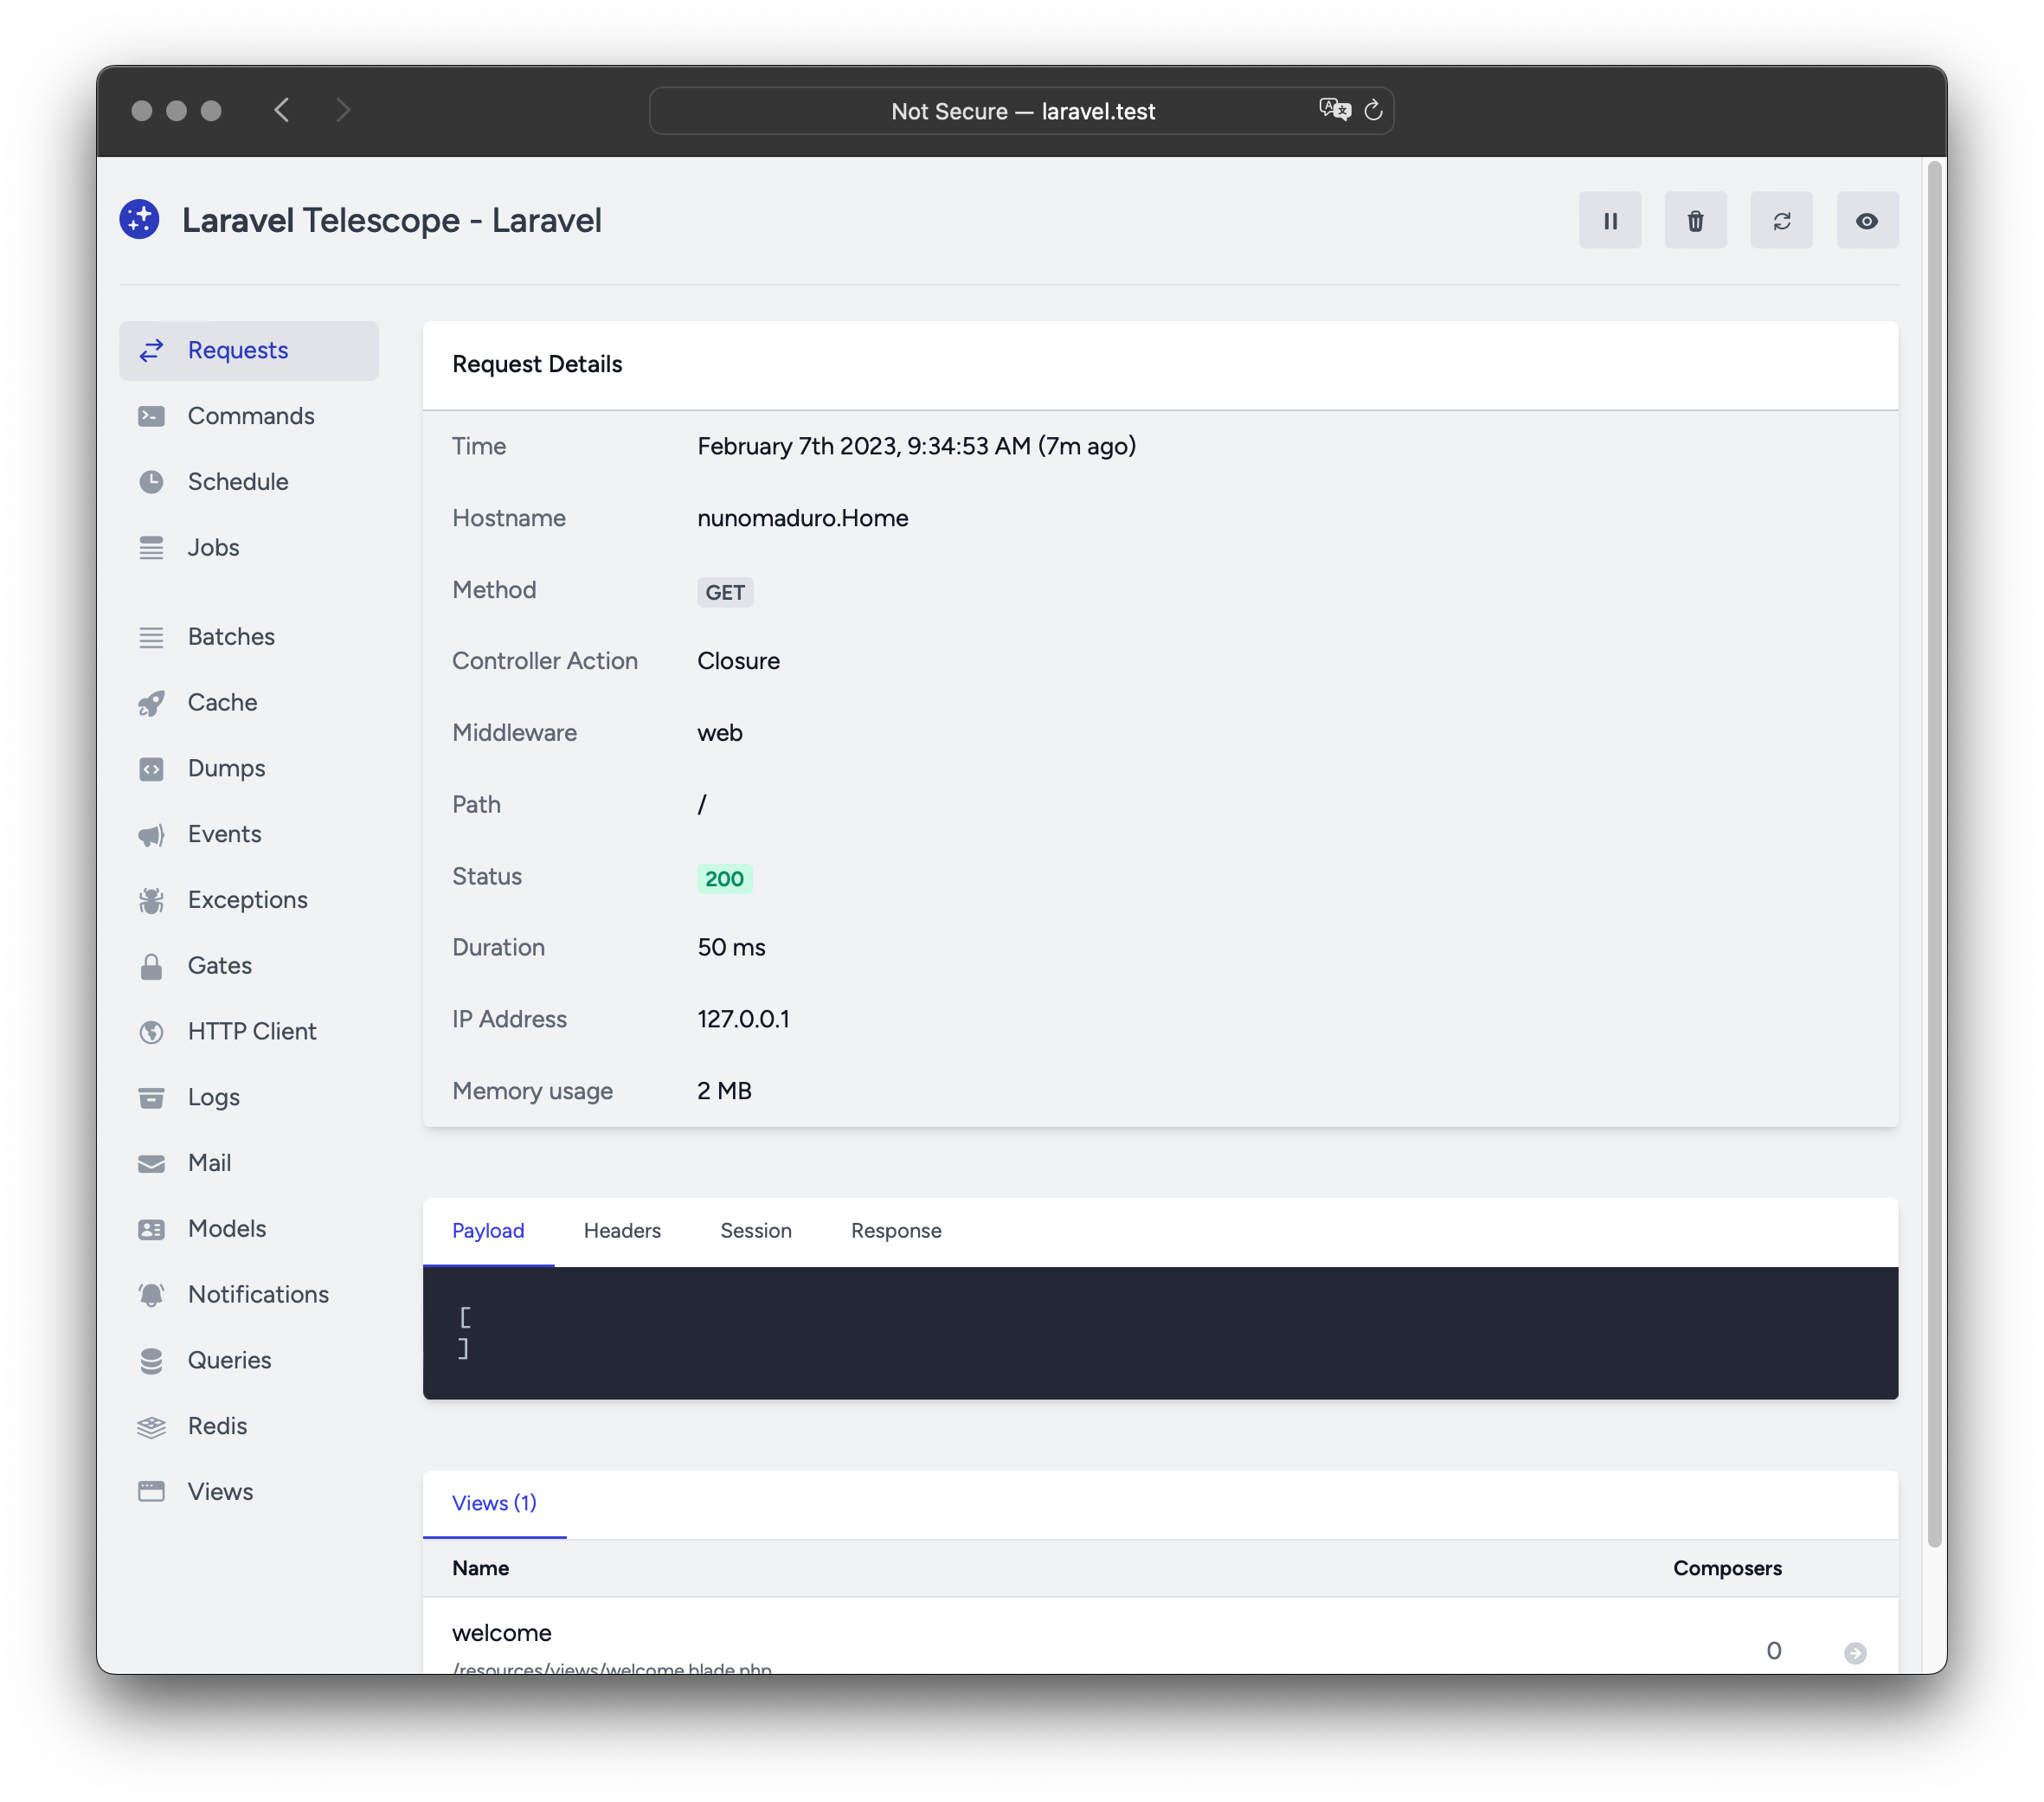
Laravel Telescope는 로컬 개발 환경에서 애플리케이션의 내부 동작을 한눈에 파악할 수 있게 해주는 디버깅 도구입니다. Telescope는 애플리케이션으로 들어오는 HTTP 요청, 예외, 로그, 데이터베이스 쿼리, 큐 Job, 메일, 알림, 캐시 작업, 스케줄 작업, 변수 덤프 등 다양한 정보를 시각적으로 제공합니다.
설치
Composer를 사용해 Telescope를 프로젝트에 설치합니다:
composer require laravel/telescope설치 후 telescope:install Artisan 명령어로 에셋을 퍼블리시하고, migrate 명령어로 Telescope 데이터를 저장할 테이블을 생성합니다:
php artisan telescope:installphp artisan migrate설치가 완료되면 /telescope 라우트로 대시보드에 접근할 수 있습니다.
마이그레이션 커스터마이징
Telescope 기본 마이그레이션을 사용하지 않으려면 App\Providers\AppServiceProvider 클래스의 register 메서드에서 Telescope::ignoreMigrations 메서드를 호출하세요. 기본 마이그레이션 파일은 다음 명령어로 내보낼 수 있습니다:
php artisan vendor:publish --tag=telescope-migrations로컬 전용 설치
Telescope를 로컬 개발에서만 사용하려면 --dev 플래그와 함께 설치합니다:
composer require laravel/telescope --devphp artisan telescope:installphp artisan migratetelescope:install 실행 후, config/app.php에 자동 등록된 TelescopeServiceProvider 항목을 제거하세요. 대신 App\Providers\AppServiceProvider의 register 메서드에서 직접 환경을 확인한 뒤 등록합니다:
/**
 * 애플리케이션 서비스를 등록합니다.
 */
public function register(): void
{
    if ($this->app->environment('local')) {
        $this->app->register(\Laravel\Telescope\TelescopeServiceProvider::class);
        $this->app->register(TelescopeServiceProvider::class);
    }
}
마지막으로 Telescope 패키지가 자동 감지되지 않도록 composer.json에 다음 설정을 추가합니다:
"extra": {
    "laravel": {
        "dont-discover": [
            "laravel/telescope"
        ]
    }
},
NOTE
로컬 전용 설치 방식을 사용하면 프로덕션 환경에 Telescope 관련 코드가 포함되지 않아 보안상 더 안전하고, composer install --no-dev 실행 시에도 문제가 없습니다.
설정
에셋 퍼블리시 후 주요 설정 파일은 config/telescope.php에 위치합니다. 이 파일에서 Watcher 옵션을 비롯한 다양한 설정을 조정할 수 있으며, 각 옵션에는 설명이 함께 포함되어 있습니다.
Telescope의 데이터 수집 자체를 비활성화하려면 enabled 옵션을 사용합니다:
'enabled' => env('TELESCOPE_ENABLED', true),데이터 정리(Pruning)
정리 작업 없이 방치하면 telescope_entries 테이블에 데이터가 빠르게 쌓입니다. 이를 방지하기 위해 telescope:prune Artisan 명령어를 매일 스케줄에 등록하는 것을 권장합니다:
$schedule->command('telescope:prune')->daily();기본적으로 24시간 이상 된 엔트리가 삭제됩니다. hours 옵션으로 보존 기간을 조정할 수 있습니다. 예를 들어 48시간 이전 데이터를 삭제하려면:
$schedule->command('telescope:prune --hours=48')->daily();대시보드 접근 권한
대시보드는 /telescope 라우트로 접근합니다. 기본적으로 local 환경에서만 접근이 허용됩니다. app/Providers/TelescopeServiceProvider.php 파일에는 비로컬 환경에서의 접근을 제어하는 인가 게이트가 정의되어 있습니다. 필요에 따라 아래와 같이 허용할 이메일 목록을 수정하세요:
use App\Models\User;

/**
 * Telescope 게이트를 등록합니다.
 *
 * 이 게이트는 비로컬 환경에서 Telescope에 접근할 수 있는 사용자를 결정합니다.
 */
protected function gate(): void
{
    Gate::define('viewTelescope', function (User $user) {
        return in_array($user->email, [
            'admin@example.com',
        ]);
    });
}
WARNING
프로덕션 환경에서는 반드시 APP_ENV 환경 변수를 production으로 설정하세요. 그렇지 않으면 Telescope 대시보드가 외부에 공개될 수 있습니다.
Telescope 업그레이드
새로운 메이저 버전으로 업그레이드할 때는 반드시 업그레이드 가이드를 먼저 확인하세요.
버전에 관계없이 업그레이드 후에는 에셋을 다시 퍼블리시해야 합니다:
php artisan telescope:publish에셋을 항상 최신 상태로 유지하려면 composer.json의 post-update-cmd 스크립트에 다음을 추가하세요:
{
    "scripts": {
        "post-update-cmd": [
            "@php artisan vendor:publish --tag=laravel-assets --ansi --force"
        ]
    }
}
필터링
엔트리 필터링
App\Providers\TelescopeServiceProvider에 정의된 filter 클로저를 통해 Telescope가 기록할 데이터를 제어할 수 있습니다. 기본 설정은 local 환경에서는 모든 데이터를 기록하고, 그 외 환경에서는 예외, 실패한 Job, 스케줄 작업, 모니터링 태그가 붙은 데이터만 기록합니다:
use Laravel\Telescope\IncomingEntry;
use Laravel\Telescope\Telescope;

/**
 * 애플리케이션 서비스를 등록합니다.
 */
public function register(): void
{
    $this->hideSensitiveRequestDetails();

    Telescope::filter(function (IncomingEntry $entry) {
        if ($this->app->environment('local')) {
            return true;
        }

        return $entry->isReportableException() ||
            $entry->isFailedJob() ||
            $entry->isScheduledTask() ||
            $entry->isSlowQuery() ||
            $entry->hasMonitoredTag();
    });
}
배치 필터링
filter 클로저가 개별 엔트리를 필터링한다면, filterBatch 메서드는 하나의 요청 또는 콘솔 명령 실행에 해당하는 모든 엔트리 묶음을 일괄 필터링합니다. 클로저가 true를 반환하면 해당 배치의 모든 엔트리가 기록됩니다:
use Illuminate\Support\Collection;
use Laravel\Telescope\IncomingEntry;
use Laravel\Telescope\Telescope;

/**
 * 애플리케이션 서비스를 등록합니다.
 */
public function register(): void
{
    $this->hideSensitiveRequestDetails();

    Telescope::filterBatch(function (Collection $entries) {
        if ($this->app->environment('local')) {
            return true;
        }

        return $entries->contains(function (IncomingEntry $entry) {
            return $entry->isReportableException() ||
                $entry->isFailedJob() ||
                $entry->isScheduledTask() ||
                $entry->isSlowQuery() ||
                $entry->hasMonitoredTag();
            });
    });
}
태깅
Telescope는 태그를 기반으로 엔트리를 검색할 수 있습니다. Eloquent 모델 클래스명이나 인증된 사용자 ID는 Telescope가 자동으로 태그로 추가합니다. 커스텀 태그를 추가하려면 Telescope::tag 메서드를 사용하세요. 이 메서드는 태그 배열을 반환하는 클로저를 받으며, 반환된 태그는 Telescope가 자동으로 붙인 태그와 합쳐집니다. 보통 App\Providers\TelescopeServiceProvider의 register 메서드 안에서 호출합니다:
use Laravel\Telescope\IncomingEntry;
use Laravel\Telescope\Telescope;

/**
 * 애플리케이션 서비스를 등록합니다.
 */
public function register(): void
{
    $this->hideSensitiveRequestDetails();

    Telescope::tag(function (IncomingEntry $entry) {
        return $entry->type === 'request'
                    ? ['status:'.$entry->content['response_status']]
                    : [];
    });
 }
사용 가능한 Watcher
Telescope의 "Watcher"는 HTTP 요청이나 콘솔 명령이 실행될 때 애플리케이션 데이터를 수집합니다. config/telescope.php 파일에서 활성화할 Watcher 목록을 지정할 수 있습니다:
'watchers' => [
    Watchers\CacheWatcher::class => true,
    Watchers\CommandWatcher::class => true,
    ...
],
일부 Watcher는 추가 옵션도 지원합니다:
'watchers' => [
    Watchers\QueryWatcher::class => [
        'enabled' => env('TELESCOPE_QUERY_WATCHER', true),
        'slow' => 100,
    ],
    ...
],
Batch Watcher
Batch Watcher는 큐에 등록된 배치 Job의 Job 정보와 커넥션 정보를 기록합니다.
Cache Watcher
Cache Watcher는 캐시 키 조회 성공(hit), 실패(miss), 갱신(updated), 삭제(forgotten) 이벤트를 기록합니다.
Command Watcher
Command Watcher는 Artisan 명령어가 실행될 때 인수, 옵션, 종료 코드, 출력 결과를 기록합니다. 특정 명령어를 기록에서 제외하려면 config/telescope.php의 ignore 옵션에 추가하세요:
'watchers' => [
    Watchers\CommandWatcher::class => [
        'enabled' => env('TELESCOPE_COMMAND_WATCHER', true),
        'ignore' => ['key:generate'],
    ],
    ...
],
Dump Watcher
Dump Watcher는 dump 함수로 출력된 변수를 Telescope에 기록하고 표시합니다. 단, 브라우저에서 Telescope의 Dump 탭이 열려 있어야 기록됩니다. 탭이 닫혀 있으면 덤프는 무시됩니다.
Event Watcher
Event Watcher는 애플리케이션에서 발생한 이벤트의 페이로드, 리스너, 브로드캐스트 데이터를 기록합니다. Laravel 프레임워크 내부 이벤트는 기록 대상에서 제외됩니다.
Exception Watcher
Exception Watcher는 애플리케이션에서 발생한 보고 가능한 예외의 데이터와 스택 트레이스를 기록합니다.
Gate Watcher
Gate Watcher는 게이트 및 정책 검사의 입력 데이터와 결과를 기록합니다. 특정 ability를 기록에서 제외하려면 config/telescope.php의 ignore_abilities 옵션을 사용하세요:
'watchers' => [
    Watchers\GateWatcher::class => [
        'enabled' => env('TELESCOPE_GATE_WATCHER', true),
        'ignore_abilities' => ['viewNova'],
    ],
    ...
],
HTTP Client Watcher
HTTP Client Watcher는 애플리케이션에서 발생하는 외부 HTTP 클라이언트 요청을 기록합니다.
Job Watcher
Job Watcher는 애플리케이션에서 디스패치된 Job의 데이터와 처리 상태를 기록합니다.
Log Watcher
Log Watcher는 애플리케이션에서 기록된 로그 데이터를 수집합니다.
기본적으로 error 레벨 이상의 로그만 기록됩니다. config/telescope.php의 level 옵션을 수정해 기록 기준을 조정할 수 있습니다:
'watchers' => [
    Watchers\LogWatcher::class => [
        'enabled' => env('TELESCOPE_LOG_WATCHER', true),
        'level' => 'debug',
    ],

    // ...
],
Mail Watcher
Mail Watcher는 애플리케이션에서 발송된 메일을 브라우저에서 미리 볼 수 있게 해줍니다. 메일을 .eml 파일로 다운로드하는 기능도 제공합니다.
Model Watcher
Model Watcher는 Eloquent 모델 이벤트가 발생할 때 모델 변경 사항을 기록합니다. events 옵션으로 기록할 이벤트를 지정할 수 있습니다:
'watchers' => [
    Watchers\ModelWatcher::class => [
        'enabled' => env('TELESCOPE_MODEL_WATCHER', true),
        'events' => ['eloquent.created*', 'eloquent.updated*'],
    ],
    ...
],
요청 중에 하이드레이션된 모델 수를 함께 기록하려면 hydrations 옵션을 활성화하세요:
'watchers' => [
    Watchers\ModelWatcher::class => [
        'enabled' => env('TELESCOPE_MODEL_WATCHER', true),
        'events' => ['eloquent.created*', 'eloquent.updated*'],
        'hydrations' => true,
    ],
    ...
],
Notification Watcher
Notification Watcher는 애플리케이션에서 발송된 모든 알림을 기록합니다. 알림이 메일을 트리거하고 Mail Watcher가 활성화되어 있다면, Mail Watcher 화면에서 해당 메일도 미리 볼 수 있습니다.
Query Watcher
Query Watcher는 실행된 모든 쿼리의 raw SQL, 바인딩 값, 실행 시간을 기록합니다. 100밀리초를 초과하는 쿼리는 자동으로 slow 태그가 붙습니다. slow 옵션으로 임계값을 조정할 수 있습니다:
'watchers' => [
    Watchers\QueryWatcher::class => [
        'enabled' => env('TELESCOPE_QUERY_WATCHER', true),
        'slow' => 50,
    ],
    ...
],
Redis Watcher
Redis Watcher는 애플리케이션에서 실행된 모든 Redis 명령을 기록합니다. Redis를 캐시로 사용하는 경우 캐시 명령도 함께 기록됩니다.
Request Watcher
Request Watcher는 애플리케이션이 처리한 요청의 요청 데이터, 헤더, 세션, 응답 데이터를 기록합니다. size_limit 옵션(킬로바이트 단위)으로 기록되는 응답 데이터의 크기를 제한할 수 있습니다:
'watchers' => [
    Watchers\RequestWatcher::class => [
        'enabled' => env('TELESCOPE_REQUEST_WATCHER', true),
        'size_limit' => env('TELESCOPE_RESPONSE_SIZE_LIMIT', 64),
    ],
    ...
],
Schedule Watcher
Schedule Watcher는 애플리케이션에서 실행된 스케줄 작업의 명령어와 출력 결과를 기록합니다.
View Watcher
View Watcher는 뷰 렌더링 시 사용된 뷰 이름, 경로, 전달 데이터, 컴포저 정보를 기록합니다.
사용자 아바타 표시
Telescope 대시보드는 엔트리가 저장될 당시 인증된 사용자의 아바타를 표시합니다. 기본적으로 Gravatar 서비스를 사용해 아바타를 가져오지만, App\Providers\TelescopeServiceProvider에 콜백을 등록해 아바타 URL을 직접 지정할 수 있습니다. 콜백은 사용자 ID와 이메일 주소를 받아 아바타 이미지 URL을 반환해야 합니다:
use App\Models\User;
use Laravel\Telescope\Telescope;

/**
 * 애플리케이션 서비스를 등록합니다.
 */
public function register(): void
{
    // ...

    Telescope::avatar(function (string $id, string $email) {
        return '/avatars/'.User::find($id)->avatar_path;
    });
}